Wednesday, June 25, 2014

Some Trouble on the Build My Guitar Front!

Build My Guitar

So here it hangs in all its glory, my guitar with a single coat of gun oil, the first of a bunch, to bring out its fabulous figuring. I would be lying were I to say I am calm about this, but it doesn't pay to get too excited, a point on which I got an important lesson on Tuesday, when I went to see Bruce Roper at his luthier's shop off Lincoln Avenue and got an unhappy surprise.

If you were living in a bubble you might not have had any trouble with humidity these past two weeks. I do not. In Pennsylvania, it was so humid it was impossible to breath even in the woods. Apparently, the same problem was at work here in Chicago. You can't see it and I'm not going to show it because it may be a problem that will solve itself, but the back of this spectacular guitar now looks a little like the surface of Lake Michigan. Wavy in a bad way. I can explain how that happened, but I am also convinced the problem will solve itself over the next couple of years. (Owning great guitars is a long-term proposition.)

How it happens.

Wood is porous, and depending on the type, some is more porous than others. That is why people who build instruments pay a lot of attention to relative humidity and the levels of humidity in the wood they are shaping. Guitars like it in the 50 to 55 percent humidity range. Bad things start to happen when humidity drops below that number, and other kinds of bad things happen when it gets above it.

Drop too far into the dry zone and the wood shrinks somewhat dramatically, sometimes cracking surfaces or pulling them away from braces. Frets, the metal strips across the fingerboard that actually stop the string so it can vibrate and make its sound, seem to grow. In reality, this is one of those, "No, fool, the sun's not going down, the horizon is coming up" problems. If frets are sticking out, it means the fingerboard is shrinking from dryness.

Bob Taylor (That's right of that Taylor) wrote a recent article and included this picture of a fretboard that has shrunk from dryness.
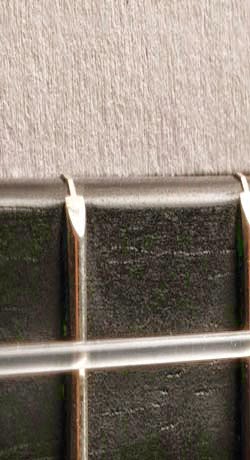
Doesn't seem like much of a problem, does it. Try to play a guitar like that and it feels like someone is pushing tiny chisels into your hands. Again, the problem is the fingerboard shrinking, not the fret. You can fix this. But this is not my problem.

I can find no pictures of what happens when there is too much relative humidity. So I will explain it. Just as wood shrinks in dryness, it expands when it gets wet. Not much of a problem for a piece of wood just sitting there, but the back on a guitar is glued in place in so many different ways it's pointless to list them. It's a solid thing if its done well.

The problem is the solid thing has no where to go if humidity comes to visit. In most cases, this is not a problem. Guitars adjust themselves. But in some cases, when the humidity goes up far and fast, the instrument can't do anything but create bumps as the swelling wood strains against the glue points. A little of that is what happened  on the back of my guitar.

Bruce seems mortified. It's not that his shop is sopping wet. Mine is the only guitar that has had this problem over the past couple of weeks, and Bruce has lots of guitars at lots of stages in his shop. It was such a wonderful thing just a few weeks ago. Now it has some bumps. I doubt anyone will ever see them but me and I view them as a small crisis in what is a relatively long journey. There is probably an upside here in a couple of years. When I put this instrument in my house, which has air in the summer (We have done well!) and the right kind of heat in the winter, the bumps will most likely go away.

Too much time on bumps. On to the neck thing. That's right, the neck thing. We're building the neck now.

And I do mean building.


Measuring for the fingerboard and headstock


The bald neck with its tension rod
Cutting to size
This part of the job is a little like building a bridge (Yes, I know, there is a bridge, but that's later). Bruce's neck bolts on in two directions. No glue at all. That means it is easy to get off if you have to remove it for repairs. This is the design he has settled on after 20 years or so of struggling with necks glued into place with everything from old horse hide glues to epoxy. It's much easier, although less traditional, to just bolt them on in a way that works. Bruce's is a way that works. He will have horizontal bolts going into the block at the top of the guitar, and vertical bolts under the fingerboard.

But first, we had to get everything about the neck ready for the big glue up!

Putting the frets on the fingerboard was pretty interesting. The frets have a 16 inch curve to them, to match the 16 inch radius curve of the neck. Bruce uses a couple of tools to put them in place. On is a simple fret cutter. The second is a little gizmo he invented that gently rocks a 16 inch curve in the fret so it will fit well.

Rocking the curve into a fret
Then he puts the fret in place and taps it a bit with a fret hammer just to get it going. Then he uses a drill press with a special jig that also has a 16 inch radius curve to push the fret into the slot. The frets have little tangs to hold them in place, but Bruce uses glue, too.

It takes about an hour to get all the frets into the neck for my guitar. When it's completed, it looks like this:

Frets in place on a fingerboard
I'm thinking we are close to a finish on this guitar, and that is exciting for me. I can't wait to hear it. We tap it each time I visit. It sounds bright and clear. That could be very nice. But we won't know until it's finished. My guess would be mid-July.

Until that time, it's all happening right here at buildmyguitar.blogspot.com.

Tell your friends. Tell your inlaws. Tell your parents. And so on. See you later!

Thursday, May 29, 2014

A Dynamic Change In Direction

Up to this point, it has been mostly about the beauty of wood and the craftsmanship of building a guitar for me. That changed Thursday night when, after some work by Bruce Roper, I got a look at this.

It comes together at Bruce's


I guess I have been waiting for this moment all along, a chance to see how my guitar would look when it is finished. I love it already. The chatoyance of the wood survived through the building process, so the figuring in the body of the instrument dances in the light. Even in its roughest state, I can see how the neck is going to finish and how it will all sit together. I have watched it at every step, so I know where the little bumps are and what Bruce did to address those issues. There are worm holes in the sides of the guitar, and they are going to stay because they make it all look so natural, like it was cut right out of a tree.

None of this would happen at most of the big name guitar places. Martin would not tolerate holes. The pieces would fit together as though they had been cut by a machine (which, in most cases even with 'hand made' guitars, they were). Bruce's guitars aren't like that. He has to bend and cut and measure and sand and shape them to get them to fit together. Why do I find this so compelling? I don't know. I have a great collection of really nice guitars, Martins and Collings among them, so I know what quality looks like. But this is different. I am watching its personality evolve. I know it, this instrument, in a way I don't know my others. For a guitar player, that kind of thing carries tremendous weight.

A guitar made in a factory might have 300 sets of hands working on it over a couple of weeks along a production line where almost everything is perfect. I have seen one set of hands make mine, starting in February. I know now exactly what goes into the process.
Cutting a truss rod channel

It was a great way to finish an evening that was built around something that might seem mundane, but will help this guitar last through generations. Take a look at the metal rod Bruce is installing down the center of what will become the neck on this guitar. It's the blue thing to the left side of the picture. This is a truss rod, and guitars with truss rods have something that guitars without do not. They can be adjusted.

That might not sound like a big deal unless you plan to keep your guitar for a long time. It's wood and because of that, it adjusts and adapts with temperatures and changes in humidity. Because the neck is stressed by the tension of the strings, it sometimes can rise or sink at the ends, which makes either a bump or a downward shift in the middle. When that happens, strings buzz, on the one hand, or become so far off the fingerboard that they go out of tune when they are pushed down (or are just too difficult to push down to be easily played.)

The truss rod can change all of that with a quarter of a turn (and I have been told it's not wise to go beyond a quarter of a turn on a truss rod.) Depending on which way you turn the rod (which has a fitting in the end for an allen key) the neck will either tighten or loosen, and that will dramatically change the "action" caused by the positioning of the strings. Bruce is careful about placing this rod because it will be sitting just under the rosewood fingerboard we have selected for this instrument. It will all be glued tight by the time it is finished.

We talked about how wide I wanted the finger board on this guitar. There are a couple of choices, but mine was to go for an inch and three quarters at the nut (the top of the neck) to give me a little more space between the strings. I love finger picking, and that extra room is important.

Measuring the fingerboard
He marks his distances with a white pencil, top and bottom, then draws lines and takes the fingerboard to the bandsaw for cutting.

Cutting fingerboard with band saw

What you get at the end of this process are a couple of lovely pieces of rosewood that will be turned into chop sticks for me (Thank you Bruce) and a fingerboard that grades perfectly from the nut all the way down to the 23rd fret, which is where the neck hooks to the body of the guitar.

Once that is cut, Bruce glues a set of "ears" to the headstock of the guitar to make certain it is wide enough to hold the rosewood coverplate and the design we will use on the top. That's going to be special, a mix of artistic carving and a nice piece of copper. But that comes later.

The next task for Bruce will be to put the frets into the fingerboard. To do this, he uses a drillpress with a special fitting that holds a little gizmo that fits right over the fret and has the same curvature as the fingerboard. This is a tedious job he wants to do alone, but he showed me how he would set one in place so we would all know about that.

The fret setting tool


Fret tool in drill press over fingerboard
Some builders hammer their frets into place, but Bruce uses this press and glues the frets into the neck because it speeds the process along, does each fret perfectly and is less likely to make you crazy. I'm not kidding. Hammering is the traditional way, and the chance is you would be bonkers by the time you finished.

When he gets all those frets glued into place, he will clamp the fingerboard onto a solid piece of maple and let it dry so that it stays flat. It has to be glued tight all the way down the neck and present a fingerboard that is absolutely where it needs to be beneath each string. If that's not right, the guitar won't play right.

We are getting close to finishing. A couple of more weeks should do it. My guess is mid July when I can strum the first chord. Bruce just bought a new spray gun and he is going to use that on the surface of the body and neck. The neck will need some shellac before that happens.

Please come back. We are heading toward the end of it and it would be nice to have you there.

Tuesday, May 20, 2014

Revelation!

The Beauty of the Thing...


Became apparent the minute Bruce Roper began to spread a thin layer of shellac on the surface. I knew it was going to be good. I didn't know it was going to be this good.

First a layer of shellac

Bruce, the luthier at Old Town School of Folk Music, has been working on this guitar since we picked out the wood at Owl Lumber in Des Plaines in February. We met Tuesday morning to go through the sanding process, which covered every inch of the guitar body, then some little repairs of things you might never see unless you were Bruce.

Using an edge on a binding repair
The problems are simple to describe. No matter how diligent you are about putting on binding (see the last blog) there will be places where some filling in is necessary. The sanding process, too, is not kind to binding. Bruce uses an orbital sander, first with an 80 grit paper to cut down the surface and then a 120 grit to finish everything off. But you don't want to use that sander on the actual binding.

Binding is something you see from the front. If you are not careful in sanding, you will cut into it and wreck the sense that its all the same size and all marching along the joint between the sides and the top, where it belongs. Just here, Bruce is using a scraper to more clearly define one part of the binding. No glue can protrude from the binding channel or it will leave a blob in the finish. So Bruce covers every inch looking for those kinds of flaws.


When he finds one, he turns to one of his best tools, Superglue, to fix it. He sprays on some hardener first, then applies the glue. After it dries, he sands it all down.

Cautious side sanding with an orbital sander


He is using a small orbital sander for the work. The good thing with this kind of a tool is that it is easy to control, easy to change paper grits on (sandpaper goes from fairly rough grits, down around 80, to very find grits up around 220) and, if it is kept moving, won't leave scratches. That's important because any scratch on the surface of the guitar will be amplified by the shellac and later the finish Bruce puts on the instrument. He doesn't want any of that showing through. It's not a time consuming process but it is fairly rigorous, with lots of stopping to check the surface by feel.

I have to admit I was a little anxious about the next step, the application of the initial coat of shellac, a finish made from the outsides of special beetles. It's a little bit magical, at least to me. I already showed you what it looked like with just one side of the back. Here's a series of photos
to show you how it went.


That's the back. Now for the front.

Shellac on the front
You can see from these photos that the wood has come alive under shellac. That means Bruce made just the right choice when we purchased that big block of Sapele at Owl early in the year.

Hanging the body to dry


Bruce and I just stood there and watched the thing rotate for a bit, making it quite clear what chatoyance will do for a guitar. I am well aware that it's going to take a long time for this instrument to "open up" and play at its best, but I do believe it will be beautiful from the point at which Bruce pronounces it completed.

Next week, we're going to start working on the headstock and neck of the guitar. How it all fits together will be of great interest to those of you who are afficiandos of styles of building.

Come back.

Thursday, May 15, 2014

Getting Totally Bent!

On the Edge!
Binding My Guitar
Bruce Roper bends binding

If you can't take the heat, then just bend with it! 

Bruce Roper and I have become dedicated advocates of an important part of the guitar building process: The Meal! Wishbone is just around the corner and ALWAYS lands right where you want it to when it is time to eat. On this particular day, a young woman named Maya waits table for us. It is a terrible day full of clouds and drizzle and the kind of pressure that makes your ears close up (at least mine.) It feels like the atmosphere has come to sit on my head. But this young woman changes my mood completely because she is so bright and cheery. Go see for yourself.  It's what guitar building is all about! Pancakes, bacon, orange juice and coffee and we headed off to Bruce's shop just around the corner.

Once again, Bruce has taken to the heating iron to begin bending the hardwood pieces that will become the binding around the top and bottom of my guitar. We're looking at thin strips of wood that might well snap if we aren't careful, and it doesn't take much heat to just safely bend them, which is what Bruce is up to at this point. Then he will diligently push them into place on a base of wood glue and tape them up so they can dry.

Binding versus purfling! Which is which? And why? Undoubtedly you have been asking yourself this question for a long, long time, as I have. Binding seals an edge. Purfling is actually an embedded strip of something, usually wood, around the top of a violin that keeps its maple from splitting. Guitars can have purfling, too. But not this one. Today is all about binding.

The binding ready for glue

This is what he binding looks like once it has been bent. As you can see, it matches the form of the guitar and will fit into the grooves cut around the top and bottom. In my case, the binding is dark hardwood on top on a base of light green wood. That coordinates it with everything else that is going on with the guitar. These are the kinds of things most people don't notice, but that I notice all the time. Sucky binding wrecks the guitar's look and seems out of place. So it's an aesthetic choice. We have chosen well here, I would suggest.

We made another discovery last week that I can now show you. This guitar will have an eye on the front. We didn't plan it that way. Nature did. Because the instrument is flitch matched, both the back and front are book matched pieces so the patterns repeat on either side of the center line. In this case, on the front, it forms what I think is a pretty perfect eye image that you don't typically see in a guitar. So basically, it's looking at you.

Matched set presents an eye!


I love the look of it, and I suspect i will love it all the more once Bruce puts a coat of shellac and some finish on the guitar. It has all kinds of little nooks and coils in the wood and each of them will add another distinctive layer to this instrument. I'm actually thinking of naming it, but I have to wait to the end to make that decision. Just now its Bruce Roper's Guitar for Madigan, which is good enough for me.

Binding is an annoying practice because Bruce has to have a couple of things going at once and there's not much I can do to help. He has to spread glue in the groove around the top, start the binding at a center point, then move around the top of the instrument pushing it in and down and taping each half inch with masking tape.

It comes out looking like this:

The tape can come off at the end of the day and Bruce can move to the next step, which is sanding with a small orbital sander and some very fine grit sandpaper. You want to get all the bumps and grain points level before you put on the first coat of finish. Then you do it again, and maybe again, until you are happy with it.

Bruce is not a believer in the "shine like a mirror" school of guitar building. A midwesterner to the souls of his feet, he wants practical protection on the instrument and maybe some beeswax on top of that. But no 30 coat efforts come out of Bruce's shop. The question will be "Is the surface protected," and the answer will be "yep." But it won't be shining like an expensive piece of furniture. It will have some depth and some shine, but not so you would be looking at that instead of the genuine beauty of the wood.

Some dental cement stuff will be used to fill in a couple of places where perfection fled the effort. I am looking at this the way Arabs look at rugs. Only Allah is perfect. What man touches, he messes up in some way. But by the time Bruce is done, you won't notice it unless you are looking for it.

Next?

The first layer of finish.

Please come back.


Thursday, May 8, 2014

A Big Problem...Solved!

How It Becomes Binding:

A Delicate Process Full of Peril

Before we got rolling on this next delicate part of buildmyguitar, Bruce Roper and I fortified ourselves with pancakes (Mine was buckwheat. Fantastic!) at Wishbone, just around the corner from his shop. That was fortunate because we would be needing the energy. Take a look at this:


That piece that goes around the outside edge of the guitar (in this case, a 1958 Martin D-28) is called the "binding," because it closes the seam between the bottom and top and hides some important brace ends that are exposed in the building process. You might think this would be easy to install, and at Martin these days, or other factories, it probably is because they have done it a million times and have worked out machines to complete the difficult parts.

 Not so at Bruce's. His guitars are hand-made. All of them. Each part.

Here is the body of my guitar on the table and ready to be routed for binding. A router is an interesting piece of equipment, basically a high speed electric motor with a razor sharp cutter on the end that spins thousands and thousands of times a minute. One might cut a guitar clean in half with a router, which, of course, is just not the objective at all. Bruce wants to cut a uniform groove around the top and bottom of the guitar so he can glue a very handsome dark wood and green binding around the top. It will kind of match the ring around the airhole on the top, but not exactly.

If everything about a guitar was square (and I'm talking about geometry here, not absence of coolness) this would be a simple process. You could put the router in a jig that put the cutter at a specific depth and height and just zip around the top.

But guitars are not square. If you have been following the blog, you might have seen an earlier entry in which the top of the guitar (and bottom) were set in special curved forms so they would each have an arch. That works very well, but not for the router. It means you can't get a guaranteed square cut along the top of the guitar, and that is irritating, not good and potentially damaging if anything goes wrong. A cutter spinning that fast will cut through sapele, which is hard wood, like it is cutting through butter, making a long trench in the wrong place. Bruce has constructed a bunch of solutions to help prevent this. Here is the one he set up first. Basically, it's like one of Thomas Jefferson's signing machines, lots of parallel things that float along and keep the router level and at the right depth. But once he had set it up, he didn't like the look of it. It would be a pity to wreck a guitar like this one, made from select woods and designed to be only mine and like no other one in the universe. A big hole in the top or side, of course, would make it distinctive, but, as you might have guessed, that's not the intent.


So he shifted to another option, a rig he designed and built himself that is free form, hand driven and good enough so that if everything goes exactly as planned, that groove will be just right. But nothing ever goes as planned.

This gives you a solid idea of what Bruce's rig looks like. But it doesn't tell the whole story. The bottom part of the rig is designed to ride along the side of the guitar to keep the router bit at the proper angle to the top, and the plate on the router is designed to keep the bit at the proper angle to the side. You really want that groove to be uniform, because the piece of binding that fits in it can take a little sanding from the top, which no one would notice except Bruce, but none from the side. It has to fit perfectly so that it is uniform as it marches around the top. (Bottom, too).

But...oh, shit! It's not working right. Some of the cut is perfect, but in some cases, the router jig pushes the cutter completely out of the groove because the top is just not level (and it's not supposed to be!) So these parts Bruce has to go over again, adjusting the angle of the router to make the cut just right. It's hard to imagine how invested I have become in this guitar, because I worried (needlessly as it turned out) at every point. The fact that the router burns the wood a bit and fills the shop with the smell of simmering sapele doesn't help (although it's a delightful smell.)

Also, that "just whip around the top and cut the groove" part isn't exactly right. Here is Bruce's schematic on how to cut a binding groove. He starts and stops for adjustments. Starts and stops because the heel on the vise holding the guitar gets in the way. Starts and stops so he doesn't go chipping any wood. Then goes all the way around the top in a different direction. This is a time tested formula. I suspect he wrecked a few guitars early in his life when he was working this out. I do not ask because he has won my respect. We all make mistakes in our careers. Bruce knows how to fix most of his.

After a nerve wracking 90 minutes, he finishes the job and starts filing the groove flat and fixing any little bumps he caused along the way. Here is how the guitar will look with its binding in place. But that can't happen for about another work because the groove needs to be prepared before anything gets glued in place.

The binding has to be soaked in water before it is installed so it bends without breaking.

We also discovered something I am not going to show you until the work is done. This guitar has an "eye" on the front, down below the air hole. Because it is a matched set that made the top, a couple of little growth rings come together just perfectly. It is as though a cyclops is watching you from down there. I love that, so natural and unexpected.

What was most interesting about this part of buildmyguitar was watching Bruce use the various rigs he has constructed to get specific jobs done. Dremel tools are a guitar maker's good friend, something Christian Martin did not have back in the 1830s when he started building fine guitars in New York. That gives you a good sense of what a craftsman he was as he built his way into American guitar history.

We finish this binding challenge next week, I suspect, then move on to the neck.

Please keep reading!

Wednesday, April 30, 2014

"The beauty that flows from this instrument..."

Inscription in the new guitar

Signing and sealing: 

A Milestone 


What would you write inside the top of a guitar being made just for you, something no one but the owner and the builder will ever see? Bruce Roper, the luthier at Old Town School and now a good friend, told me I could say whatever I wanted. Never at a loss for words, I was at a loss for words until I thought about it. What was I getting out of this experience? I didn't need another good guitar, having many. I didn't need much of anything in the way of musical instruments, but if you have been following this blog, I think you will understand that the wood and the glue and the cutting and pasting and clamping were just the mechanical part of the process. What I value the most is the friendship I have built with Bruce Roper over the past few months. He produced a CD for me so I knew him, but I didn't really know him. Now I have listened to his gentle explanations of what is going on, his feelings about wood and how to pick it, his thoughts about writing and performing music. I have watched him use his hands in a hundred ways on this project. I was watching someone who knew, from long practice, what to do about anything that came up. So I thought I had to say something that stretched beyond the guitar.

I have also heard him talk with great affection about his bandmates in Sons of the Never Wrong, Sue Demel and Deb Maris Lader. I have been in bands and I know the kinds of pressures that build until the whole thing fractures and you run away screaming about one another. After nearly 25 years, he still laughs when he talks about the times they have had (and continue to have). When you see them on stage, what is there is genuine. They aren't acting. I so admire that. 

Friendship.

"The beauty that flows from this instrument is friendship," I wrote, in my own ridiculously sloppy handwriting. Then I signed it, and so did Bruce, and then the whole process moved on to the finishing of the box. This is a very important step because it is the first time anyone can get a full view of how the guitar will look when it is finished. The chatoyance I talked about much earlier is stunning, front and back and sides. It is going to be such a lovely work that I hesitate to put a pick guard on it. I plan to use the guitar for finger picking (without picks!) so I don't think I'm going to be banging it up.

The back, braces trimmed and ready for glue

Bruce trimmed the braces and got them ready for glueing to the sides of the guitar. He put the top on last week in a similar process. This side involves a little guess work and some measurement by eye. He has done it so many times it goes smoothly.

Marking the brace spots

Because the bottom has to fit tight against the sides, Bruce must trim little slots into the sides where the braces will fit, just so it all looks tight and sealed when he moves to the next step (placing the bindings, which comes next week.) He does his trims with a Dremel tool then uses his band saw to cut little notches in parts of the top that don't fit handily in the jig when the bolts are installed.

Cutting the brace notches
It might seem like a tedious process, but it isn't. It's just a series of steps that Bruce follows closely whenever he makes this kind of guitar. He's helping a client build a classical guitar on another bench nearby, and that one involves a whole different world of steps. Those will be meticulously followed, too.

Watching him work, I got to thinking about which part of this process actually leads to a good instrument and I concluded, "All of it." I know, that sounds like a cop out. But it's not. Guitars are a process of the whole, but the individual parts have to be right or it's not going to play well or sound good. So I think what I am seeing is a craftsman at work who knows all the steps and performs them at a very high level of skill. It takes the romance out of the instrument, I suspect, but there you have it. It's a bunch of pieces of wood glued together so they vibrate well and create a noise.

Here is how it looks when the back is glued up and screwed down to dry, a process Bruce completes just after he glues a series of rosewood straps along the inside of the sides of the guitar. This is protection. Sometimes guitars are bashed around a lot and the sides can be broken fairly easily unless they are reenforced. Nothing much better for that than rosewood strips.
Top glued down. Looking at the neck
Rosewood reenforcement strips on sides


Closing this all up was a little sad, like being four days through a seven day vacation and knowing that it's all going to end. But guitar building is just like life, I suppose, which is a really stupid thing to say because, after all, everything is just like life. It begins. It develops. It ends.
Except with this, you get a friendship and music! Next: Binding and then on to building the neck.


Wednesday, April 23, 2014

Weight Loss: Take a Chisel to The Fat Parts

Bruce Roper sculpts the braces on my guitar

 I don't want to say "This is what I have been waiting for" because that's not the case. I'm waiting for my guitar.  But this part of buildmyguitar is very important because it involves weight loss. Those are Bruce Roper's hands behind the chisel and that's an important thing to note. They are "behind the chisel." Any body part that might be cut or lopped off in this process has to be kept behind the chisel because it is that sharp. One slip could easily slice off half of a finger or carry the blade right to almost any bone in your body. Chisels are so dangerous that my old shop teacher in Altoona, Pa., Mr. Wray, insisted we walk with our thumbs over the end of the blade so we didn't accidentally slash anyone. If he saw you walking with an open chisel blade in the air, he had a paddle he had constructed of walnut and he would pound the back of your legs until you wept. It was a different time. But that was very effective, I must say.

Or maybe he just liked beating eighth grade boys with paddles! That's a possibility, too.

Bruce, the luthier for Old Town School of Folk Music's Different Strummer music shop, is building a guitar for me. These blogs started with the selection of a great piece of Sapele at Owl Lumber in Des Plaines and continued through cutting it up, selecting the flitch-matched top and bottom and moving step by step through the challenges of guitar building. Today, the top is going to be glued on after the bracing is sculpted.

 Bruce has tapped hard with his fingers on the top of the guitar with its braces glued on and concluded its pitch is too high, that its sound is too hard. We needed to work this out because once the top is glued on,  it's too late to begin the sculpting process. Before you know it, the whole body will be completed and glued together, and you are NOT going in there unless something awful has happened.

Blade sculpting with a chisel
During this two-hour visit, Bruce pruned those braces with his chisel and then sanded them until they were sculpted into the shape of blades. Every few cuts, he tapped and listened. That brightness gradually became a little muted, which is what he wanted. And as he cut, the braces began to look like helicopter blades. That's one of Bruce's signature contributions, the helicopter blade sculpting of braces. No one will ever see it, but chances are it will make the top of the guitar much more lively over on the treble side where the high strings, the G, B and E, live, and much deeper over on the bass side where the wound strings, the E-A-D strings live.

Here is how the sculpted brace looks before Bruce has taken sandpaper to it to smooth it out. You can see one just north of his hand that has been about completed. The braces are spruce, so Bruce has to be careful. He knows his craft. Just when you think the brace is going to split, he flips the top and goes at it from the other end. 

There are lots of debates in the world of guitars about the value of sculpting braces. The C.F. Martin Co. in Nazareth, Pa. used to sculpt all guitar braces, then it stopped and let them leave the shop un-sculpted and now it sculpts the special ones and custom guitars. Some makers insist on sculpting all of their guitars. Cheaper guitars avoid sculpting. They just glue the up and ship them out. They are generally somewhat sloppy inside, with glue coming out of the braces and kerfing.

You will never see that on Bruce's guitars. He is not a perfectionist about it, but he is the complete professional and experienced over many years of building. His guitars look confident, comfortable with themselves and well finished.

We had a big philosophical discussion over lunch about guitars in general and song-writing, too. He has seen all the flaws after two decades fixing broken instruments at Old Town and he has designed his guitars to avoid some of the more common problems. On song writing, we were just about in unison, although he has been comfortable at it for many years. We are not much for collaboration. I worked in a band with two other guitarists and a woman singer. He is a member of Sons of the Never Wrong, probably the strongest group to emerge from the folk era in Chicago. They remain delightful and Bruce thinks it can't be better than to be the guy in a trio with two women.

This is unlikely to ever happen for me. Too cranky, I suspect, and too insular about the process.

Back to guitars.


The sculpted braces

 I think you can get a sense from this picture of how it all comes out when the sculpting is completed. Perhaps half of the weight of the braces has been trimmed away, The underside of the top has an elegant look to it, which is too bad because no one will get to see it, other than right here. There is one more piece Bruce will put in after the top is glued down.

The headblock addition
If you look to the right side of the picture above, you see the head block, where the neck fits into the guitar. This is generally viewed (by Bruce at least) as a dead area of guitar top where nothing much happens musically when you hit the strings. Still, it is one of the places he finds himself fixing a lot as a repair man. Splits and cracks show up on the guitar top near where the neck hooks on because of the varied stresses on the top.

To fix that, he cuts a thin piece of pine and glues it to the guitar top just where it fits over that end block. That means the top of the guitar is reenforced by wood that has grain running perpendicular to the grain of the top. In other words, it's not going to crack or split.

Just about time to make some final adjustments and glue the top on. You can see how it sits on the sides by looking closely at the picture above. The reason the fit is tight is that Bruce has prepared the sides to receive the top and trimmed the braces so it all fits snugly. Which is exactly what happens when he puts these things on.

What things?
Glue on the kerf to hold down the top.


Well, the things that look more or less like marshmallows with bolts stuck through them. Of course they aren't. They are actually wooden rounds with cork glued to the bottom. It takes about 24 of them to hold the newly glued top down. When you put it all together, it looks like this:


So that's how that happens. You tighten up the bolts with wingnuts (not too tight) and give it a day sitting and you have a well glued top. There are special deep throated clamps that hold down the very center of the front and back. The bases are all covered, as the sports writers might put it.

The same thing is going to happen to the back of the guitar, but it will be a little easier because the braces there are parallel. Then on to bindings, which are going to be stunning.

I hope you read all of this. If you do, you will have a chance to say Happy Birthday to Sue Demel, one of Bruce's partners (along with Deb Maris Lader) in Sons of the Never Wrong. I took two songwriting classes with her at Old Town School and she's brilliant. Tough but brilliant. And not to be missed if you have a chance to see her perform.

Onward with this tiny snap of Bruce's note on the form, Gibson N.L. 1937
That stands for Gibson Nick Lucas, 1937. Among about a million other things, Nick Lucas wrote "Tiptoe Through the Tulips" in 1929.
We'll be back next week with more as buildmyguitar pushes on.